Here are few photos of sweets made by students. I am especially charmed by the little green frog.
 |
| From SweetPersimmon |

Here are few photos of sweets made by students. I am especially charmed by the little green frog.
|
| From SweetPersimmon |







As part of my tea study, we delve into the realm of Japanese sweets making, or learning how to make wagashi. As a self-defined foodie, I am fascinated with wagashi. The taste, appearance, subtle flavor and poetic name all combine to provide the taster with a unique and truly one-of-a-kind experience. One of the most enchanting ways to enjoy wagashi is with a bowl of tea. The sweet, eaten before your tea, cleanses your pallet and then brings out the flavor of the tea. No need to add sugar to your tea now!
Making your own wagashi is a challenge if you are currently not studying with a teacher. A teacher shows you the correct method you will need to make authentic Japanese sweets – it's not something you can learn from a book. I have made only a handful of wagashi: steamed & bean-filled sweets, sesame flat cookies and lima bean wet sweets. When making your own, it’s important to weigh everything out in grams –There is no such thing as “eye-balling it” when creating wagashi. By taking the time to weigh each ingredient, you are ensuring consistency between each sweet. Since the main ingredients are very static with a recipe, what vary are the appearance, texture and flavor. Every sweet is hand-formed and therefore each sweet is unique. A true artisan will take the same 5 – 10 ingredients and create something that is a mini, delicious work of art. Part of what is so lovely about creating your own wagashi is deciding what they should look like. Use food coloring, sweets molds, spices, sake, fruit and (most importantly) seasonal inspirations to make phenomenal wagashi.
It seems that anyone who is interested in wagashi has a difficult time finding new sweets recipes available in English. Even if you find a recipe, you may not be able to make it since many of the ingredients and materials are difficult to find outside of Japan. It doesn’t seem like there are any sweets recipe specialty books available in English. (Please, prove me wrong!) One thing you can do is eat many sweets and take note of what is being created in Japan. Ask questions about the sweets. Save your favorite images in a recipe book so when you do have that one coveted recipe (hey, there are a few available on this blog) you can make dozens of unique tasting and beautifully-shaped sweets. Bon Appétit!
Recipe Resources
Midorikai Sweets Recipes – This website is staffed and funded by Midorikai Alumni volunteers, so please consider a donation of any amount for its continuance and development if you decide to use this resource.
About.com – I haven’t tested any of these recipes, but feel free to browse. There might be a jem here. Word of the wise: Don’t experiment with a recipe the day you plan to serve it to guests.
Flickr – If you immediately want to start looking at images of wagashi, check out the great albums available for free on Flickr. Search for the keyword “wagashi” to get started.
I have a tea friend in Seattle who has been collecting whimsical things to use for an April Fool's Day chakai. I love his sense of humor and creativity in putting together found objects for the utensils for this chakai.
Take a look at some of these:


The sweet we had at Robiraki was a sweet bean soup, called zenzai. It is especially welcome at Robiraki when the weather has turned cold and rainy and the guests leave the tea room for a short break outside. I have a request for the recipe as follows:
Ingredients:
1 lb adzuki red beans (454 grams)
10.5 oz. white granulated sugar (300 grams)
10.5 oz dard brown sugar (300 grams)
1 Tbls. usukuchi (thin) soy sauce
mochi (sweet rice cakes) or boiled dango
roasted chestnuts (optional)
Check the beans carefully and discard any broken or off color or misshapen beans. Rinse the beans in cold water several times then soak overnight in plenty of cold water to soften. Drain and discard soaking water. Rinse beans and cover with fresh cold water. Gently bring beans to the boil and skim off the foam that comes to the top of the pot. Boil gently until the beans are soft and cooked through. (about an hour).
When beans are done, pour off the water until the beans are just barely covered. Add both the sugars and soy sauce. Bring back to boil, stirring in the sugar. Turn down the heat and simmer for another 15 minutes. Taste for sweetness. You can add sugar if not enough. Simmer until all sugar is completely dissolved. The zenzai can be served now, but tastes much better if it is allowed to cool and sit overnight in the refrigerator.
When ready to serve, cut round or square mochi pieces and lightly grill until golden brown under the broiler. (Or from round balls of dango and boil until it floats). Heat the zenzai until very hot.
Place a few pieces of grilled mochi or dango in serving bowls and ladle the hot zenzai on top.
Optional you can roast and peel chestnuts and cut in half and put in the bowl with mochi and put hot zenzai on top.
This recipe makes about 20 small servings. I cut this recipe in half and reduced some of the sugar (for my taste) and had enough for 7 people for Robiraki. (5 guests, two mizuya helpers).
This also can be served over ice cream for a tasty dessert.
Go ahead make some zenzai this fall.
 One thing I love about Japanese tea, they always serve wagashi (general name for sweets). It is practically impossible to count how many different types of wagashi exist when you take into account the numerous recipes and ingredients. The main ingredients for wagashi are beans (Azuki beans, kidney beans, soy beans), grains (mochi-rice, rice flour, wheat), potatoes, sesame seeds, Kanten (a natural hardener) and sugar. No fat or oil is used to make wagashi. These confections run the gamut from frothy abstract shapes to exquisite works of art made to look like flowers, animals or seasonal shapes such as autumn maple leaves.
In Chanoyu, there are two kinds – well there are many different kinds. but two main categories of sweets, higashi or dry sweets, and omogashi the larger wet sweets. Generally speaking, higashi are for usucha or thin tea, and omogashi for koicha or thick tea. Omogashi usually have a poetic name, too – like hakubai (white plum blossoms) or Yamazato (mountain village).
In Japan, it is pretty easy to get sweets. There are shops that specialize in certain types of sweets, some are very famous. Sweets are made fresh daily at shops and we used to go just before closing to get the marked down leftovers.When I lived in Kyoto, one of my sempai and I would go around to the different sweet shops to sample the sweets. We made a map of the best shops in the city with notes on their particular specialty and which ones we liked the best. There is one that has a wagashi bar. It is like a sushi bar. The chef behind the bar will have a selection of seasonal sweets. When you choose one, he will make there in front of you and they will serve you a bowl of matcha. Heaven.
In America, it is more difficult to get sweets, though sometimes you can get them at Asian grocery stores and they tend not to be very fresh. I learned an easy to remember recipe for mochi and red bean paste sweets from my sensei that can be made with easily obtained ingredients.
Easy Daifukumochi tea sweets
Make a bean paste of red azuki beans, (kidney beans if not available). You can also buy sweet bean paste powder or red bean paste in a plastic bag if you can find it.
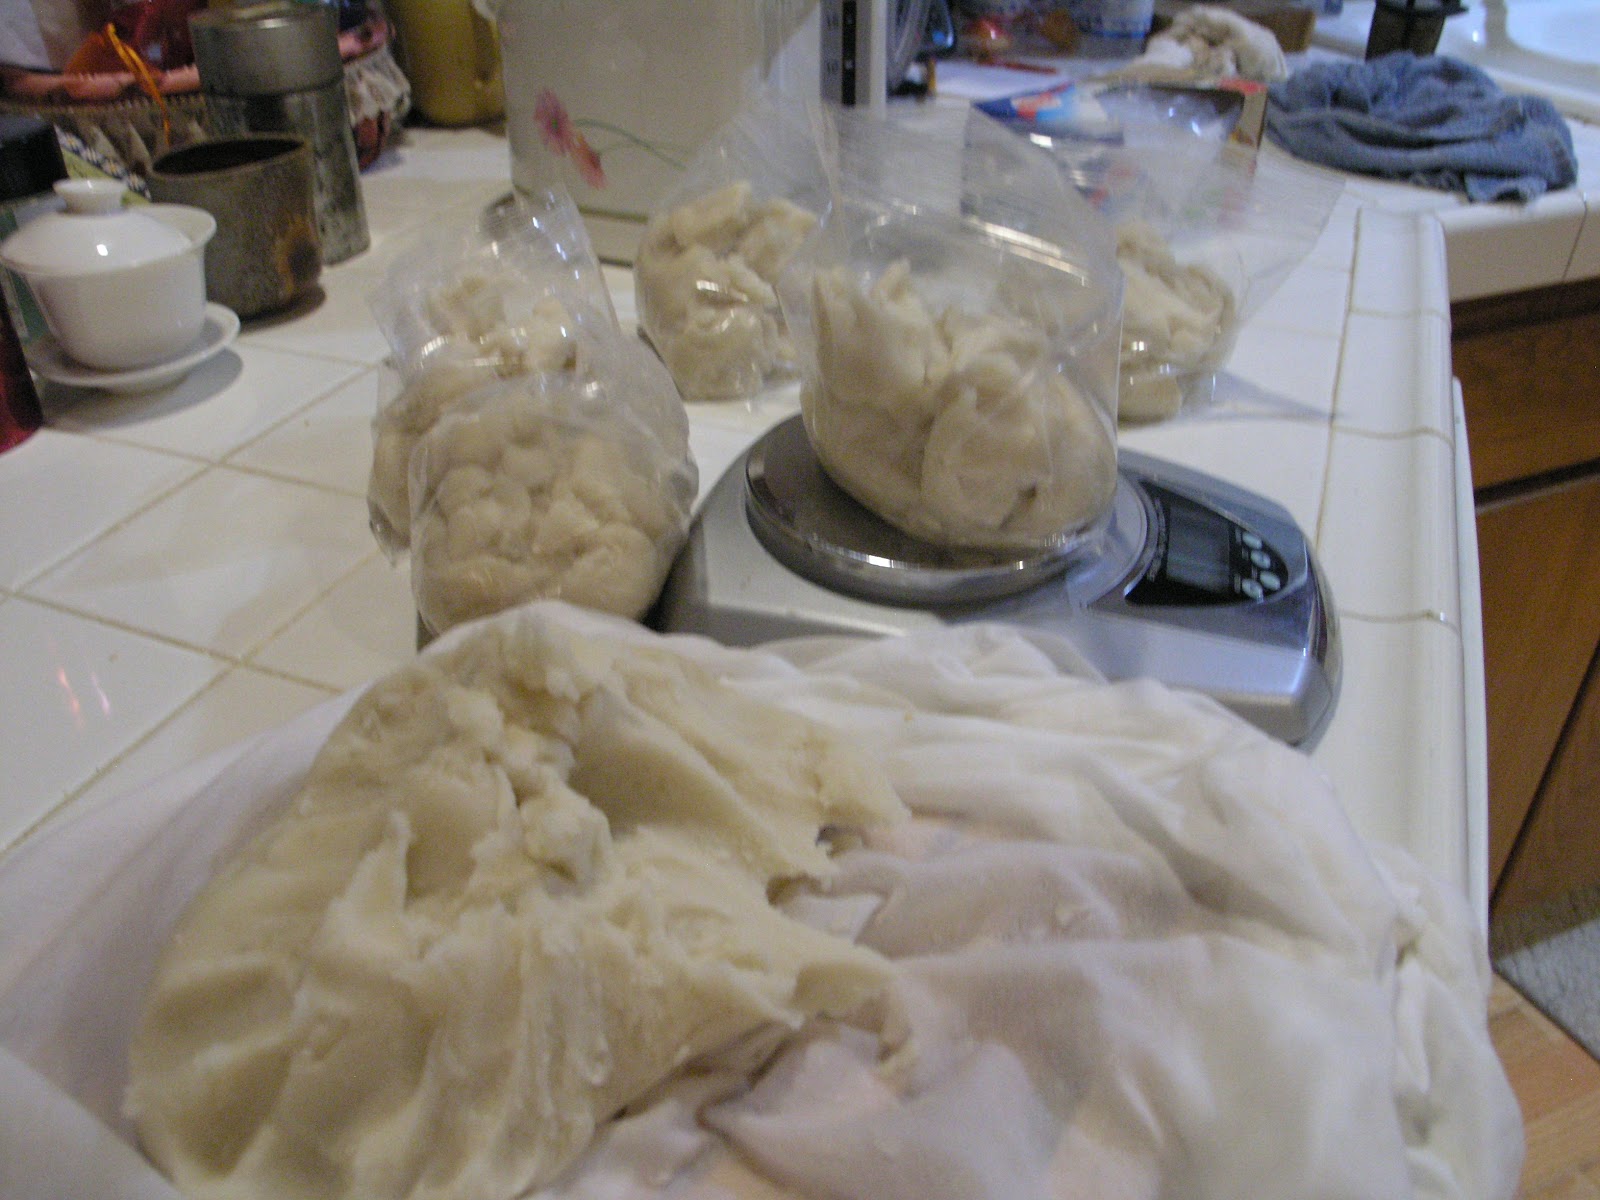
Soak beans overnight, and cook until very soft. Strain cooking water and beans through a mesh strainer into another bowl to eliminate bean skins. Throw skins away (or compost). Then strain the beans mush and water through a muslin cloth. Squeeze as much water out of the cloth as you can. Put the bean paste in a pan on the stove and add one third (in weight) sugar and cook over medium heat stirring it until the paste thickens. It will tend to get very thin and watery as the sugar melts, but then it will thicken up. When it is thick enough, the bean paste will stand and mound nicely and is not too sticky. Remove from heat and distribute in small mounds on a well wrung, lint-free towel to cool. Cover with towel so it will not dry out. This can also be double wrapped in plastic wrap and put in a zip lock and stored in the freezer up to 3 months. When cooled, form into 1 inch balls.
To make mochi covering, take one cup of mochiko flour (can be found in the Asian aisle of most supermarkets), one cup of sugar and one cup of water and mix together. (The proportion is important 1-1-1. You can make half a recipe, too). Put through a sieve to eliminate lumps. At this point you can add food coloring to suggest seasonal references (such as purble for iris). The secret to keeping the mochi soft is to add a tablespoon of karo light corn syrup. Mix well and microwave for 1 minute, take out and mix well. Microwave for 2 minutes, take out and stir to mix well. Microwave 2 more minutes and stir again. By now it should be getting clear and elastic. Make sure it is completely translucent by microwaving in 30 second increments. Turn out glob of mochi from the bowl onto a cookie sheet or pan sprinkled liberally with corn starch. Sprinkle corn starch on top to prevent sticking. Wait until cool enough to handle. Pinch off about a one inch ball of the mochi and flatten it in your hands. Be careful it will be hot. Put bean paste ball in center and pinch closed. Turn over and bush off excess cornstarch with soft brush. I put them into a paper muffin cup to keep them separate until I am ready to serve.


